
Early on in the planning of this little adventure I knew I needed a way to track the decisions and details. I had my top down calendar (blog post here) that helped me to block out and shift dates around. It helped to show approximately where we would be or wanted to be.
What I really needed was a location by location planner. I found a few on the internet but wasn’t impressed with any of them. Most examples I found had a section or two I needed but they were all broken up into seperate pages. Those were meant for printing. I hate paper and I like PDFs. So I ended up borrowing small ideas from multiple different sources so I could make one that fit my organizing style. Most of what I came up with below is commonsensical.
When I finally pieced all my ideas together and organized them onto one page I ended up with the below sheet. Everything available on one page. I can zoom in and out of it. I can write on it, add pictures, and insert other PDFs. I love it.
It is available below in Word and PDF format. Grab the Word format, edit it, and make it your own. If you do that send me a copy I would love to see what you came up with.
I cannot emphasize the importance of recording your planning. Early on in the UK I double booked us for transportation. At some point I had purchase both bus tickets AND train tickets for our trip from London to Bristol. I didn’t realize this until I received reminder email notifications from both companies. Thankfully bus tickets are relatively cheap. Although, even cheap things x5 stacks up quickly and becomes too much for our budget.
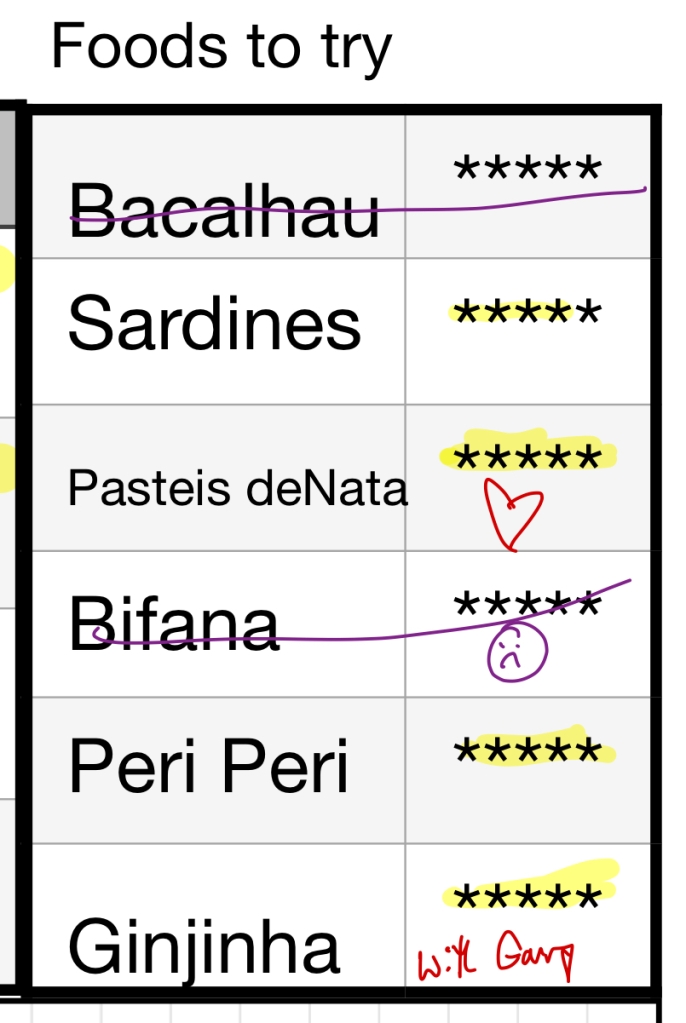
I would normally work through a resource like this moving left to right and top to bottom. This time I’m going to start with the most important area: Foods to Try (top/right). This section is a sample taken out of the planning page for Portugal. I didn’t have a chance to try bacalhau or bifana but I did check off other food goals.
A drink of Ginjinha with my father-in-law was a goal that was happily completed. Sharing food goals is fun!
As a family we also had to compare the Pasteis de Nata (custard tarts) against the ones made at our local bakery. Don’t worry Edmonton we’re in good hands with the Portuguese Canadian Bakery!
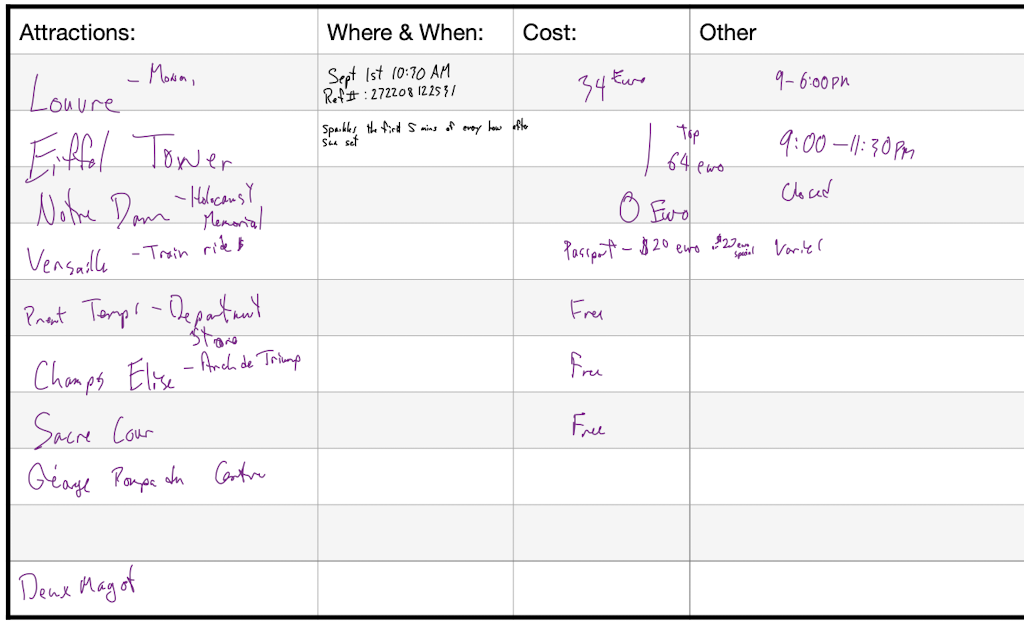
Attractions:
This is where I stored the attractions we learned about while listening to podcasts and watching travel shows. This area includes just enough details to help us plan a day or two. It is simply a reminder of the basic facts of the attractions. As you can see Paris was a very hectic few days. That list doesn’t even include all the things that we accidentally encountered while walking.
Details:
These important details are squeezed together tight. I initially had the departure details at bottom of the page but moved it here so I could see it all together.
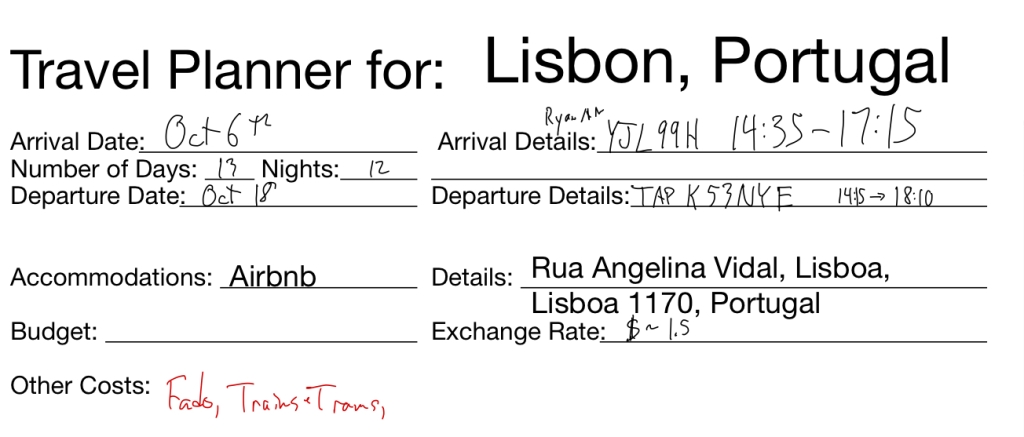
When I have new information I make sure I write it down right away. I don’t want to double book us for accommodations or transportation. Being able to quickly access a flight or confirmation number here helps me track it down in my files or emails by doing a quick spotlight search.
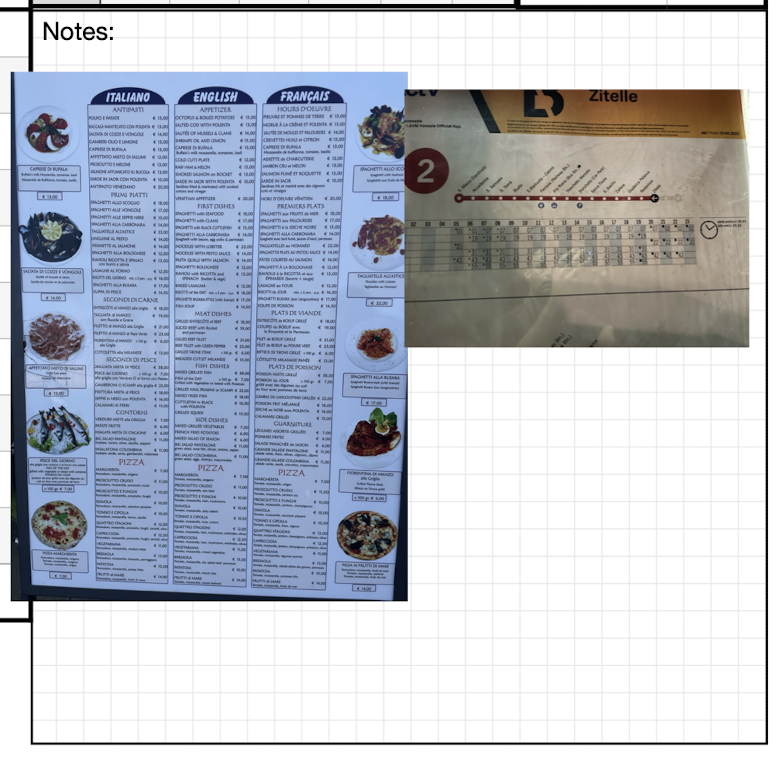
Notes:
The notes area is where I jam in all the details that don’t really fit anywhere else. I think it mostly is filled with menus we walk by and local train/bus/water taxi schedules. These are usually grabbed on-the-go and inserted later. The Photos App stores lots of much needed information. Using location data is a great way to find where we took pictures of a menu if we need to make our way back to the restaurant.
Month:
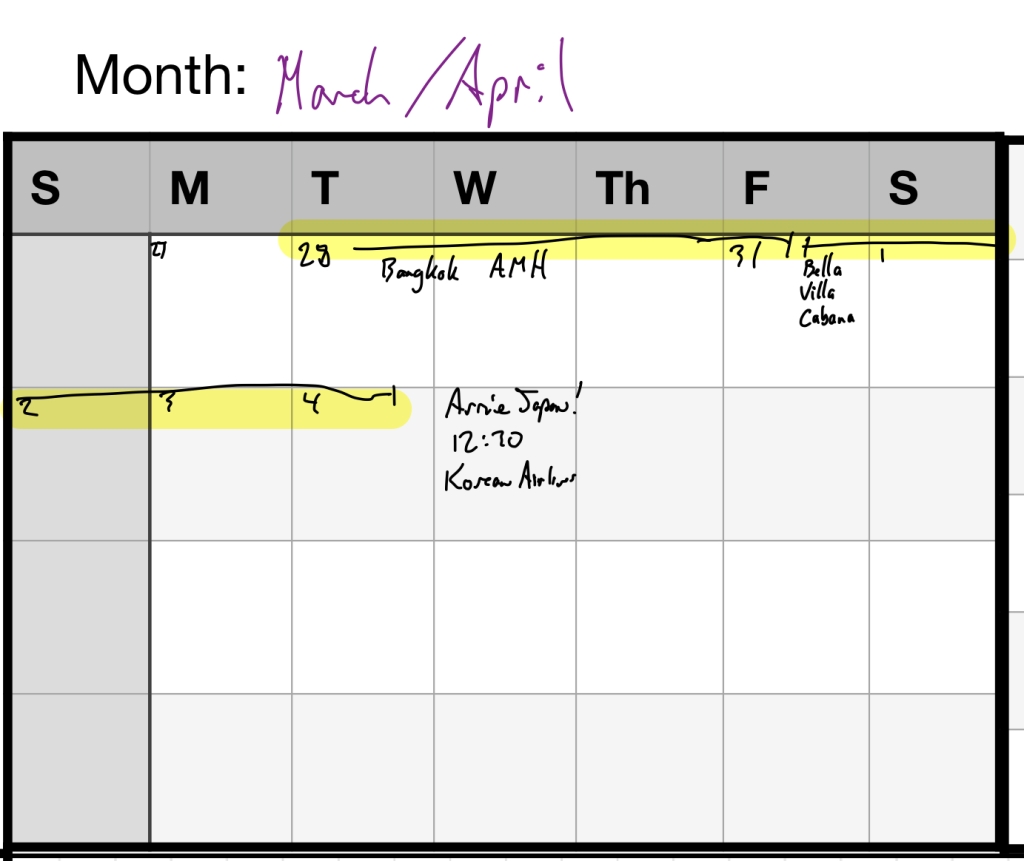
The Month area is a simple visual reminder for me as I plan. Often when arranging things I need to actually see the days and weeks. This helps me process the arrivals/departures and check-ins/check-outs.
This is also the area that I point out to our children the most. Keeping them informed helps keep the anxiety down. Sometimes I have to show them this area several times a day.
iPad vs Mac
It should be noted that the annotating is all done on my iPad with an Apple Pencil. I like the idea of paper but I don’t want to carry around a binder so instead I use the GoodNotes App. I can zoom in on the pages to write very teeny tiny. The purchasing of tickets and all the researching is done on my Mac. With the keyboard and larger screen it is the tool for that.
Folders
Don’t click on these! They’re just pictures.
Outside of the planning pages I also keep my files as organized as possible. There is enough stress pushing through customs. I don’t want to burden myself with more anxiety trying to scramble for lost docs. Inside these files are the letters, visa applications, tickets, and research for each country. These all sync between the iPad and the MacBook but, they are primarily created or saved from my Mac.

At one point there were folders for India, Israel, Tanzania, South Korea, and Taiwan. The Home file contains all our rental information. Family has vaccines, letters, and general visa info.
At this point the only planning pieces I need to get down are the trips around Japan and our flights home.
If you do end up using this planning sheet please don’t worry about giving me credit for it even if you monetize it. I would really love to see how others evolve it for their own use though. So if you end up changing it send me a picture of how you have made it work best for you.

2 responses to “Organizing and Planning”
You are so organized but guess you need to be with an adventure like yours.
LikeLike
A lot of good ideas here, I guess if your not this organized things could go south fast. You could use this type of planning even for a two week adventure.
LikeLike